Get started
Blockish connects your AI (Cursor, Claude, and more) to the real Gutenberg editor. This guide gets you from install to the place where you connect — about two minutes.
1. Install Blockish Core
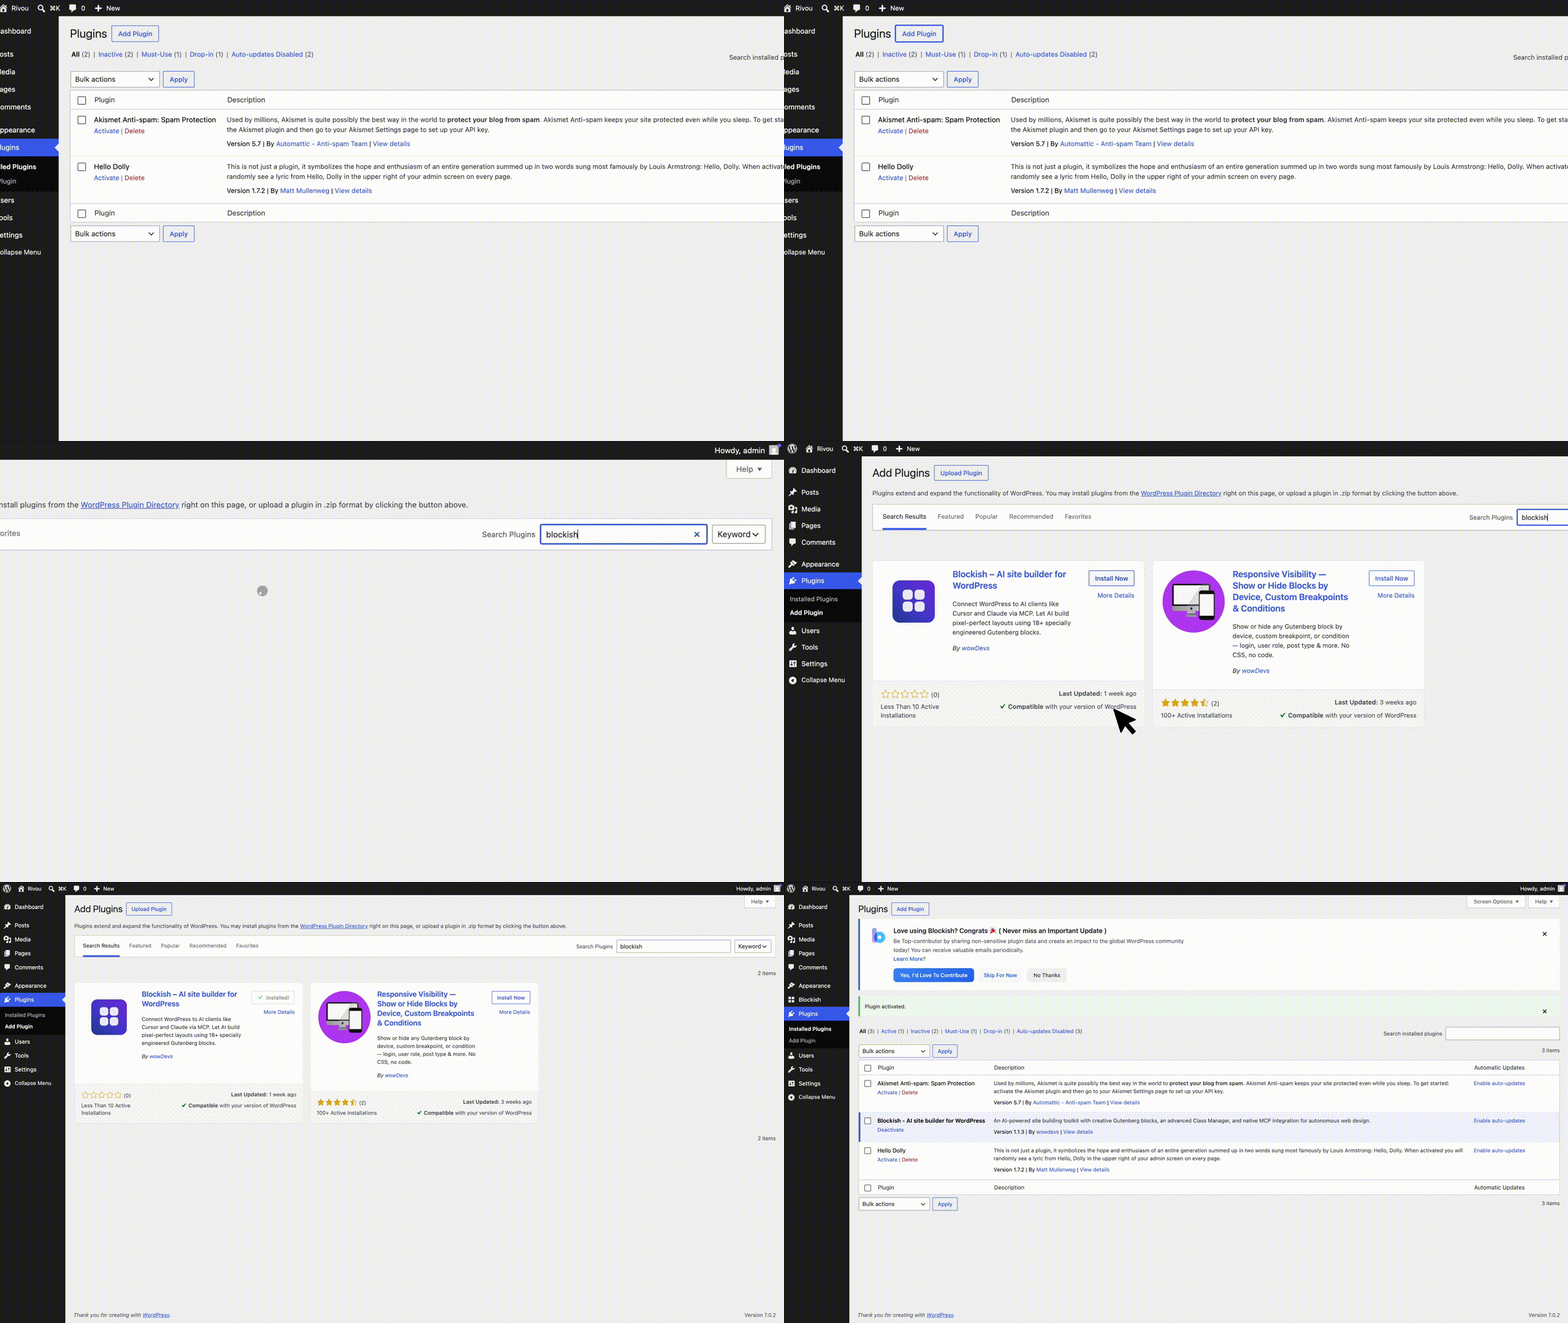
Install free Core from WordPress.org (or upload the plugin zip), then activate it.
In wp-admin go to Plugins → Add New. Search for Blockish, install, and activate. Or upload the .zip if you have a package from us.
After activate, you should see Blockish in the left admin menu.
2. Open the Dashboard
Click Blockish in the admin menu. This is your home base — you do not need every screen on day one.
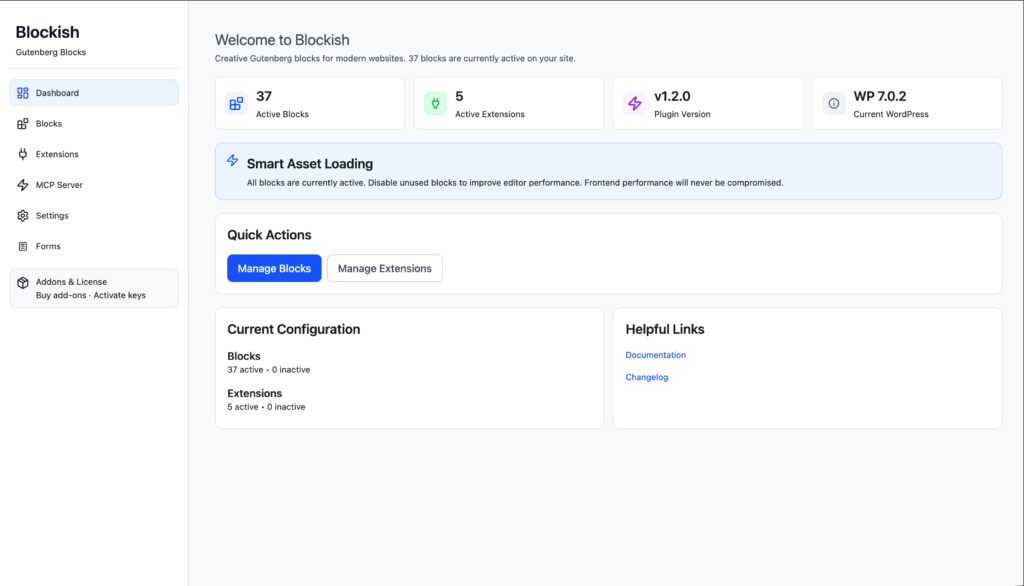
What you will see in the sidebar:
Dashboard — overview of your setup.
Blocks — turn Core blocks on or off.
Extensions — Class Manager, motion, and other editor tools.
MCP Server — connect Cursor, Claude, or another AI client (next step).
Settings — site-level options.
Addons & License — buy Forms or Dynamicity and activate license keys.
For now, only remember: MCP Server is where you connect AI. Addons & License is only when you need Forms or Dynamicity.
3. Connect your AI (next step)
Open Blockish → MCP Server. Use the connect wizard to pick your client (Cursor, Claude Desktop, and more), create an Application Password, and run the CLI command the wizard gives you.
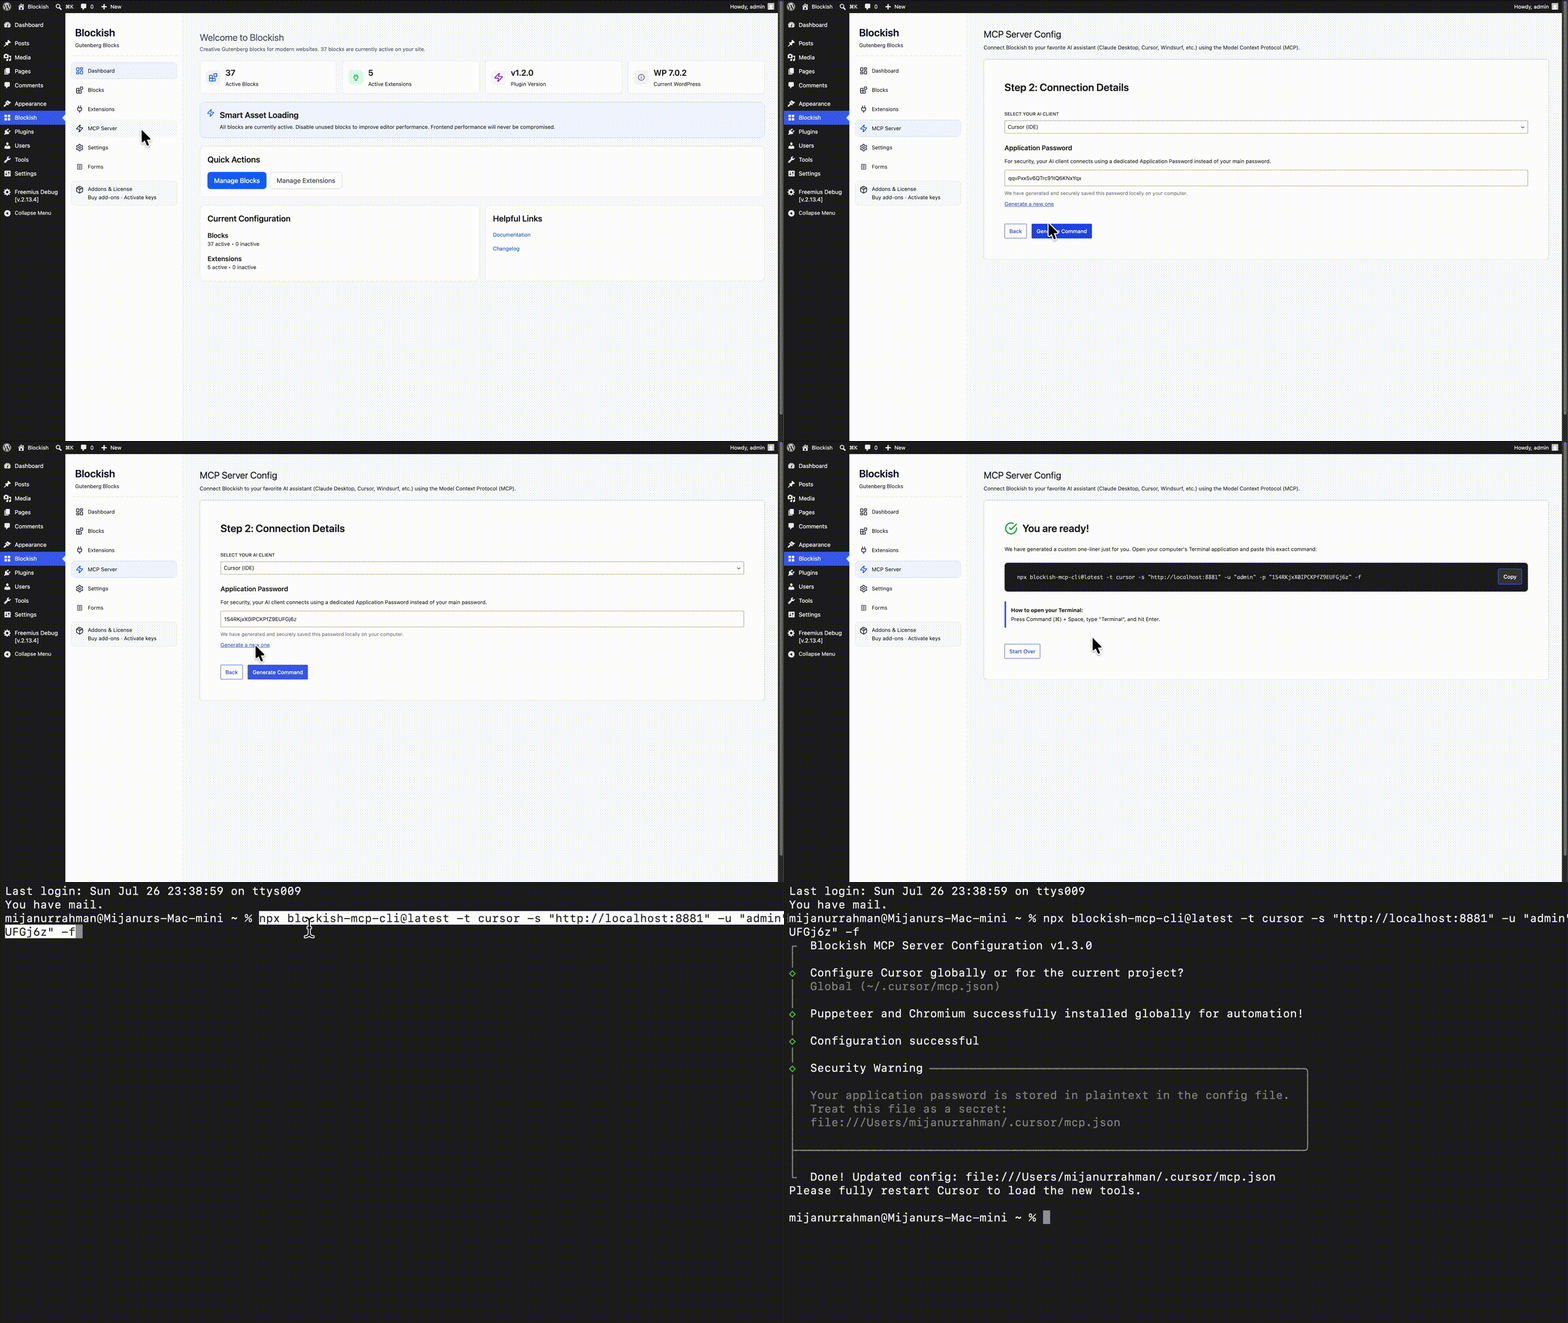
Full steps for each client — including restart and “tool not found” fixes — will live in How to connect. Follow that guide next when it is published.
4. Your first win
When MCP is connected, open any page or post in the editor and ask your AI to build a section. Blockish shows a preview. You Accept when it looks right — or Discard and ask for changes. Nothing goes live for visitors until you Accept and save.

You are done with Get started when: Core is active, you can find the Dashboard, and you know MCP Server is where connect happens.
What’s next
How to connect — Cursor / Claude setup in detail.
How Accept works — review, Accept, Discard, and save.
Blocks, the Template Library, and Class Manager are there when you need them — discover them from the Dashboard and the editor after you are connected.